All these tedious steps are no longer necessary. As long as the app you’re using supports iOS 8 extensions, sharing becomes even easier.
Learn about extensions
Before we start sharing, please take a moment to learn about the different types of extensions available on iOS 8. There are four main types of extensions in operating systems.
1. photo extension
These appear in the Photos app and allow you to share photos and videos directly to third-party apps.
2. Share form
Apps that support share sheets let you share photos, videos, and links to other apps. Safari supports share sheets, and Chrome has added it.
3. action extension
When you click the share button in Safari, you’ll see two rows of icons. The first row is for the shared table and the second row is for the operational extension. Actions were limited to printing, copying, and bookmarking, but now include third-party applications. Unlike share sheets, where browsers share content, actions allow third-party applications to “send” information to your browser. For example, you can use 1password to automatically enter your password while browsing the web.
4. Interactive notifications and widgets
Interactive notifications let you respond to text messages or calendar invitations from the lock screen or a small banner at the top of the screen. You don’t need to do anything to enable these features – support for this is enabled by the application. The widget quickly shows you updates in the notification center. We’ve covered how to enable widgets in iOS 8 and introduced our favorite iOS 8 widgets.
Now that you understand the different types of extensions, here’s how to enable them.
photo extension
Want to use a third-party app to edit your photos? You can do this quickly through the Photos app itself. Here’s how.
1. Open the Photos app and open any photo.
2. tap edit in the upper right corner.
3. Now click on the three dots icon in the upper left corner.
4. tap more in the pop-up window.
5. You will now see a list of installed apps that support the Photos extension. There will be an on/off switch next to each app, so turn on the extension you want to enable.
6. You can also drag the three horizontal lines next to the switch to change the order in which these extensions appear.
7. Once the extension is enabled, click “Done.”
Now, these extensions will appear every time you click “Edit” and click on the three dots icon after opening any photo.
Share form
Share sheets allow you to share data with third-party applications. Here’s how to use them.
1. Open Safari and open any website.
2. Click the share button.
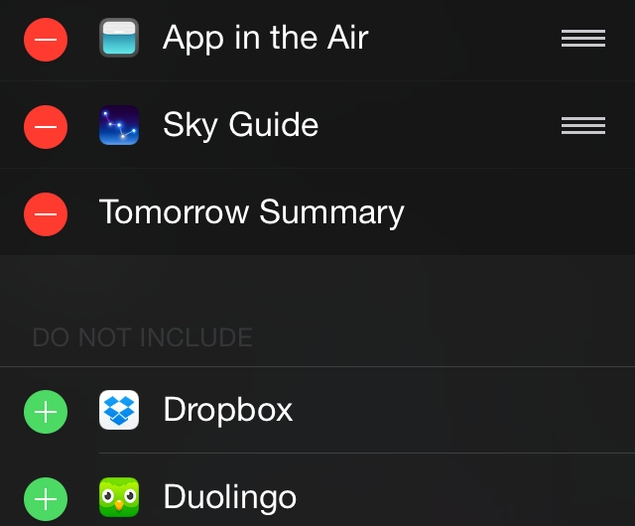
3. In the first row of icons, swipe to the end of the list and tap More.
4. A list of installed applications that support the share sheet will appear here. Slide the on/off switch and tap the three horizontal lines icon to reorder.
5. After completing the settings, click “Finish”.
6. Now click the share button in Safari to see your enabled extensions.
action extension
Password manager apps are taking full advantage of this feature. Here’s how to enable it.
1. Open Safari and go to any website.
2. Click the share button and swipe left on the second row of icons.
3. Swipe to the end of the list and tap More.
4. Installed applications that support action extensions will now appear in the list.
5. Use the on/off switch to enable or disable them. Drag the three horizontal lines icon again to rearrange the extensions.
6. Click “Done” when finished.
7. Now go back to Safari and click Share to see the extensions appear in the second row. Password manager apps use this to let you quickly enter passwords on any website.
One problem with extensions so far is that no application remembers the order in which you want the extensions. We noticed that no matter how many times we changed the order, the extension always seemed to reset to the default order. This bug will hopefully be fixed soon, but it won’t affect the extension’s functionality and enabled extensions will still be there, which is more important anyway.
We hope you have successfully configured the extension on your iOS device. Tell us your favorite extension in the comments. For more tutorials, visit our How-To section.

