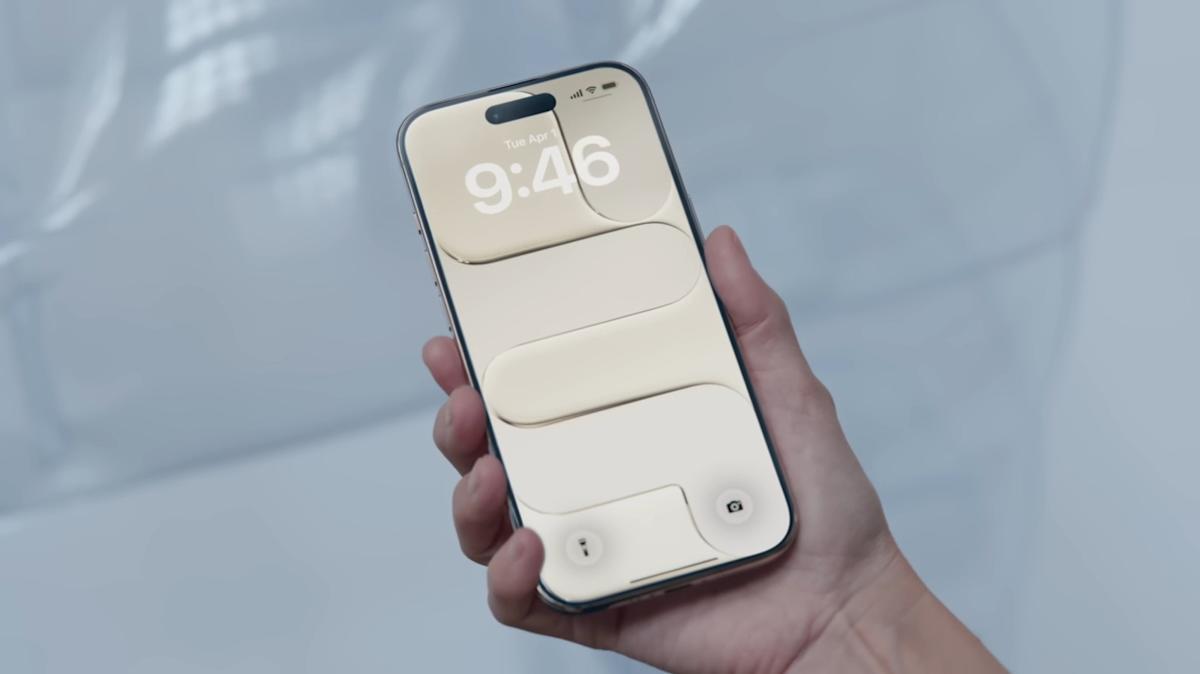
It’s been a while since iOS 26 rolled out to iPhones, and by now you’re probably pretty familiar with iOS 26’s key features. You’ve heard about the new Liquid Glass design and how it contrasts with the flat, colorful UI that iPhones have had for years. Maybe you’ve also tried setting up call screening, enabling text spam filtering, and using real-time translation integrated into FaceTime and Messages. Many of these features are welcome changes that will prove useful in your daily life, but if you think your system upgrades stop there, think again.
Just like every year, Apple continues to improve its current operating system in the months after its launch. For iOS 26, these subtle enhancements started in iOS 26.1, and the update has gone through several iterations. But what changes do these updates bring to the iPhone? Let us take you through five features Apple recently added to your iPhone that are worth exploring.
Read more: I fell in love with the iPhone 16 Pro Max, but I’m still returning it and going back to the 14 Pro — here’s why
AirDrop code for unknown contact

Two iPhones showing AirDrop code on iOS 26 – Techno Window/YouTube
AirDrop comes in handy whenever other iPhone users want to share files or photos with you. But while it’s convenient, it’s not particularly safe. When it’s set to “10 minutes per person,” any nearby random iPhone (not just the one you expect) can easily send you a transfer request. Of course, you do need approval before you can start a transfer, but there aren’t really any restrictions on the sender’s side. All they have to do is select anyone available within range. This encourages some people to send spam requests.
To solve this years-long problem, Apple added AirDrop code in iOS 26.2. The AirDrop code is a verification code provided by the recipient during the transfer request. The sender must enter this code on their end; otherwise, the transfer will not be completed. However, you only need to provide AirDrop codes for devices that are not in your contacts. AirDrop will work as usual when receiving files and photos from friends and family. Here’s how to generate and use AirDrop codes when making transfers to unknown senders:
-
Set AirDrop to “Everyone” for 10 minutes.
-
On the sender’s device, select the file or photo you want to share.
-
Click the share icon and select AirDrop.
-
Under “People,” tap the recipient’s iPhone.
-
Return to your device and wait for the AirDrop code prompt to appear.
-
Click “Get Airdrop Code” and ask the sender to enter the generated code.
Almost immediately after, the transfer will begin and you should see the progress on the screen. Once the transfer completes successfully, press “View” to view the file.
Liquid glass customization

iPhone iOS 26 display liquid glass customization-Marinel Sigue/BGR
If there’s one feature that strongly divides iPhone users into two camps, it’s liquid glass. Some people like the novelty of it; Others hate its dynamic look. Fortunately, in iOS 26.1 and iOS 26.2, Apple has resolved some user issues with Liquid Glass.
The updates include two customizations related to the ever-polarizing UI design. First, iOS 26.1 features a Liquid Glass setting that can apply a transparent or tinted appearance to UI elements. Transparent is the default liquid glass effect, with transparency and reflective effects. Tinted, meanwhile, is more opaque and can dilute the glassy appearance. Then, iOS 26.2 fixed Liquid Glass on the lock screen clock. You can now change the glass glossiness of your clock to suit your style and readability preferences.
On iOS 26.1 and later, here’s how to set up the Liquid Glass settings to use:
-
Click Display & Brightness.
-
Choose between clear and tinted.
If you’ve updated to iOS 26.2 and later, you can adjust the appearance of your lock screen clock by following these steps:
-
On the lock screen, press and hold an empty space.
-
Click Customize and click Clock.
-
In the Glass tab, move the bottom slider to the left to make the clock more glassy, or to the right to increase its opacity.
-
Press Done to save your new settings.
In addition to the slider, you’ll also see a “Solid” tab that completely removes the glass effect from the clock.
Alarm reminder

iPhone iOS 26 displays emergency reminder with alert – Marinel Sigue/BGR
The Reminders app on your iPhone is designed to notify you when you need to perform an important task. Unfortunately, the best it could do before was send you an alert that sounded just like any ordinary notification you’d receive on your phone every day – meaning it was easy to miss. While this works well for non-urgent reminders, it’s not ideal for time-sensitive reminders that require your attention.
The good news is that iOS 26.2 fixes this problem with a new emergency reminder option. What it does is trigger alarms on a schedule. It looks and works like your regular alarm clock, but is colored blue instead of orange. With a blaring alarm sound, you’ll be less likely to ignore the alert. To set a reminder as urgent, you need to do the following:
-
Go to Settings and scroll down to Apps.
-
Under Reminders, toggle the Alerts option.
-
Open the Reminders app and tap the plus button in the lower right corner to create a new reminder.
-
Fill in the fields as normal and turn on the Emergency switch.
-
Now, set the date and time. You can also click “Repeat” and select your preferred frequency.
-
Press the blue checkmark at the top to save your emergency reminder.
At the scheduled time, a reminder will sound an alarm on your iPhone. Click “Snooze” to snooze the alarm for nine minutes. But if you want to turn it off, just click “Stop.” Either way, a reminder notification will pop up on your lock screen. You can mark it as done and clear the notification, or click the Reschedule button to set up a new schedule.
Screen flash notification

iPhone iOS 26 shows alert settings screen flashing – Marinel Sigue/BGR
Sometimes, whenever a call or message comes in, your iPhone’s ringtone isn’t enough to grab your attention. This is especially true when you’re in a busy place like a restaurant or farmer’s market. To solve this problem, Apple introduced LED flash to sound alerts, where your flashlight will flash for a few seconds whenever you receive a notification. This situation has existed for several years.
But the problem with it is that you don’t always have the phone face down. So even if the LED does flash, you may not notice it if it’s blocked by your hand or table. As a complement to LED flash, Apple has introduced screen flash for alerts and integrated it into iOS 26.2. This is one of those useful iOS 26 features you might not know about because it’s hidden in accessibility settings, but you should definitely give it a try. To enable screen flashing for alerts, follow these steps:
-
Launch Settings and go to Accessibility.
-
Under “Hearing,” go to “Audio & Video.”
-
Scroll down to the very bottom and click “Flash Alerts.”
-
To flash only your screen, tap Screen. You can also choose to flash the screen and flashlight at the same time.
In the “Alert Flash” settings you can also enable “Flash on Unlock” and/or “Flash in Silent Mode” if desired. From here on, each time you receive an alert, your screen will brighten for about a second before returning to its original brightness level.
Support AirTag 2

Holding phone with AirTag 2 setup and AirTag 2 – Brandon Butch/YouTube
Surprisingly, Apple released the second-generation AirTag at the end of January, nearly five years after the first-generation AirTag was launched. The AirTag 2 is very similar to its predecessor in terms of design, but behind the scenes, it’s received massive upgrades. First, it is equipped with an ultra-wideband chip and an enhanced Bluetooth chip, which expands its coverage by 50%. This means that precise lookups will occur further away than before. AirTag 2’s built-in speaker volume has also been increased by 50%, making it easier to hear from a distance.
In order to add AirTag 2 support to current iPhones, Apple simultaneously launched iOS 26.2.1 at the end of January. If you have the new AirTag 2, here are the steps to set it up on iOS 26:
-
Update your iPhone to iOS 26.2.1 and enable Bluetooth on your phone.
-
Pull the tab on the new AirTag 2 and place the AirTag about two inches from the iPhone.
-
Once you see the pop-up window, click “Connect.”
-
Choose a preset name for your AirTag, or scroll to “Custom name” to enter a personalized name.
-
Click Continue and press Agree.
-
Wait for AirTag to complete the connection, and finally click “Finish” to exit the setup.
If you want to try tracking your AirTags, open the Find My app and go to Devices. Then, select your AirTag from the list. To make it beep, click Play Sound. To find an AirTag by pinpointing it (essentially like a compass on your phone pointing to the AirTag’s location), select Find. In the Find My app, you can also share AirTags, set notifications when you forget your AirTag or someone finds it, and mark it as lost.
Like this article? Sign up for BGR’s free newsletter and add us as your go-to source for the latest technology and entertainment, as well as tips and advice you’ll actually use.
Read the original article about BGR.