


The iPhone 6s and 6s Plus, which will start shipping in the U.S. and other markets on Friday, will automatically shoot three-second videos to accompany your regular shots, including selfies.
Imagine taking a photo of your child blowing out the birthday candles and taking video showing the flames going out as everyone sings “Happy Birthday.” Yes, including sound. You can also enhance photos of pets and landscapes (such as waterfalls).
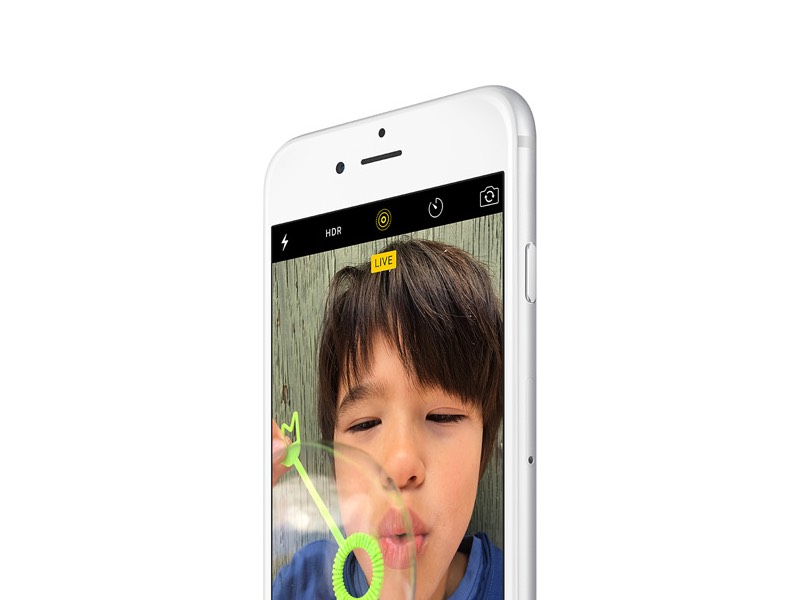
You’ll need one of the 6s models to capture these Live Photos, but older phones will work too.
This feature takes practice, so check out these tips:
shooting
When you open the camera app, the iPhone will continue to record video in the background, but if you do nothing, the video will be discarded immediately. When you take a photo, the phone saves a second and a half of video from before that shot and continues recording until a total of three seconds has been taken.
Wait a few seconds before shooting so the video doesn’t show you moving your phone into position. Likewise, don’t drop your camera immediately after shooting. The phone will detect the motion via an upcoming software update and can therefore automatically stop the video. Now, wait for the yellow “LIVE” box on your screen to disappear before moving.
Ask your subject to hold the pose for longer. If they start moving or talking, the video will show up. If you use flash, the video will show your flash firing, so natural light is better.
Still photos are a key part of live photos, and video just enhances that. Pay attention to perfecting your still photos in terms of focus, lighting, and composition. You don’t need to wait for video recording to finish before taking another photo. Just continue shooting as normal and the phone will automatically create an overlapping three-second video.
View and share
To view Live Photos on your phone, tap and hold on an image in the Photos app. On the Apple Watch, you can view it in its Photos app or as part of a custom watch face that contains the image. On a Mac computer, go to the Photos application and move your cursor over the Live box in the lower left corner. Your device requires the latest system software – iOS 9 on iPhone and iPad, watchOS 2 on Apple Watch, and El Capitan on Mac. Mac updates are coming soon.
Share Live Photos with family and friends through the Messages app – as long as they have an up-to-date Apple device. Otherwise, they’ll just get a static image. Make sure the message is sent as iMessage, it will appear in blue. If it’s green, this is a standard text message and there will be no video. You can also share them through your phone’s iCloud Photo Sharing and AirDrop features, but not as email. Apple also allows other services such as Facebook to create tools for sharing and viewing.
Because Live Photos contain audio, don’t share them with people you just chatted with.
Photo management
When editing photos, the video section is turned off. You can get it back, but then you’ll lose your changes. Use iMessage to send a Live Photo to yourself to make a copy to edit. Just send it to your Apple ID email address instead of your phone number.
You can export Live Photos to Mac and Windows computers and find video files that work with most video programs. Lower quality than usual to save storage space. Also, Apple hides these files under normal usage, so this is mainly for advanced users.
Each Live Photo takes up approximately twice the storage space of a regular photo. You can’t just delete the video portion, but you can disable video recording by tapping the yellow circle on the screen. Apple’s iCloud Photo Library service may free up some storage space on your phone, but you’re better off buying a phone with more storage first.